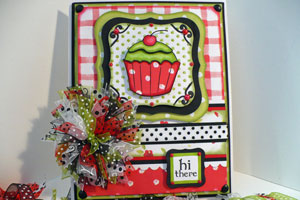
Ribbon Blossom
by Pam Bassett
Create a beautiful ribbon blossom with a few steps.
Supplies
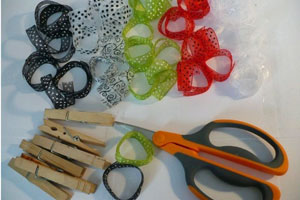
- 6" length ribbon pieces (as many as you want, 50 used here)
- Two 8" length ribbon pieces
- Clothespin
- Scissors
Step-by-Step
-
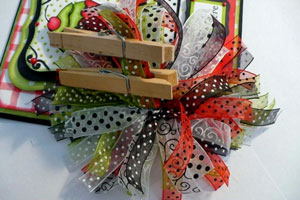
Step 1
Separate 6-inch pieces of ribbon by color/style, then arrange in a pleasing color pattern.
Use clothes pins to organize.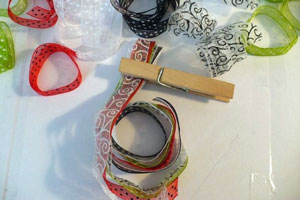
-
Step 2
Gather all ribbon pieces together in one bundle.
-
Step 3
It's easiest to make the blossom right on the card.
Add ribbon to the base of your card (here, white ribbon with black polkadots), then run the first 8-inch piece of ribbon underneath.
Attach the ribbon bundle by TIGHTLY tying the 8-inch piece in a knot around the center of the ribbon bundle.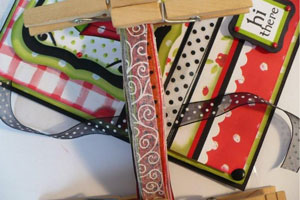
-
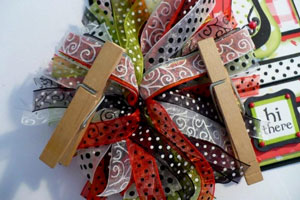
Step 4
TIGHTLY knot second 8-inch piece of ribbon around center of bundle.
It's best to use two pieces of ribbon to attach the blossom so there is still one piece of ribbon holding it together if one ribbon should tear.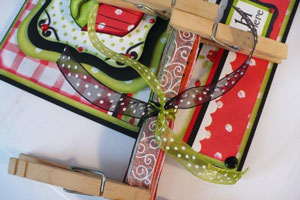
-
Step 5
Starting on the RIGHT side of the knot used to attach the blossom, pull back all of the ribbons from that side leaving the bottom two pieces.
Tie the two pieces together, pulling tightly until the knot slides all the way to the center ribbon/knot attaching the bundle to the card. One of these pieces will now be pointing to the TOP of the card, the other will be pointing to the BOTTOM of the card.
Continue tying two ribbons at a time until there are about 5 ribbons remaining (not yet tied) on the ribbon bundle you're working on.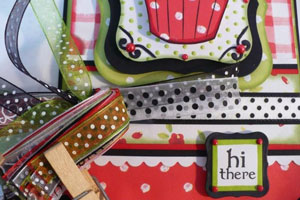
-
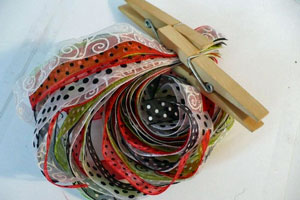
Step 6
This is how the RIGHT side of the bundle will start to look as you continue to tie two ribbons together at a time.
The ends will fan out more and more as you work your way through the bundle on this side.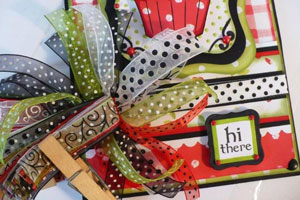
-
Step 7
Moving on to the LEFT side, start with the bottom two ribbons, and repeat Step 5.
Save the last 5 pieces of ribbon on the LEFT side, too. Clip them together so you can identify them easily.
-
Step 8
This is how it will look when all but the last 5 pieces of ribbon on the LEFT side have been tied.
-
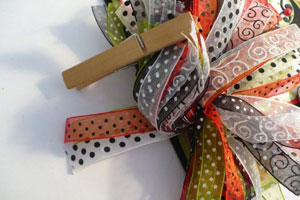
Step 9
The remaining 5 pieces from both the RIGHT and LEFT sides of the bundle have been clipped together.
-
Step 10
Now, from each set of the remaining ribbons, pull the fifth ribbon from each side toward the BOTTOM direction of your card, and, again, tie a TIGHT knot. By having the knot pulled as tightly as possible toward the center, these knots will not be visible when looking at the finished blossom.
Continue, tying ribbons, turning the card as needed.
-
Step 11
After all knots have been pulled tightly and toward the center, no adhesive is needed to hold it all together.
-
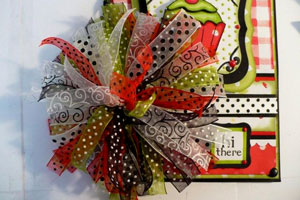
Step 12
Starting at the center top, use sharp scissors to begin trimming to shape the blossom.
The ribbon pieces toward the center (on top) will be shorter, and the length of the remaining pieces longer and longer as you work your way to the outer/lower pieces.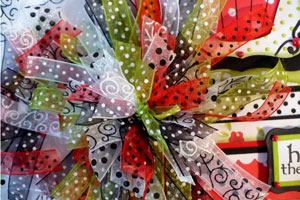
-
Step 13
Upon completion, this blossom measures approximately three inches across.
Video!
Your Turn
You've seen the tutorial, now you try it! We've got a section of the gallery set aside for Ribbon Blossom. Try this technique, then upload your artwork to the gallery. Show us your creations!
***Please note - Internet Explorer/Edge is not a supported browser, and will not allow you to see the videos. Please use Chrome, Firefox or Safari to view our tutorial videos.

 *
*
Questions and Comments
We'd love to get your feedback or questions. Leave your comment below.
Thanks!
Thanks PAM
U Rock!
Thanks again Pam.
Dommage que ce soit en anglais....pour nous pauvre francaise ........
Merci
Page 1 of 5 pages 1 2 3 > Last »