Surprise Pop Up Card
by Beate Johns
A few cuts and scores and you will surely make someone smile with this card.
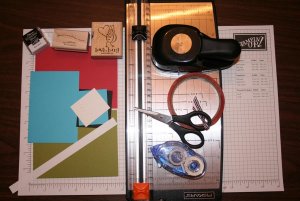
Supplies
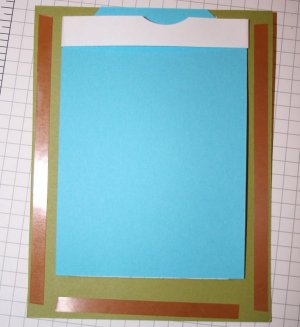
- One 4 1/4" x 5 1/2" piece of cardstock for the front (here Old Olive)
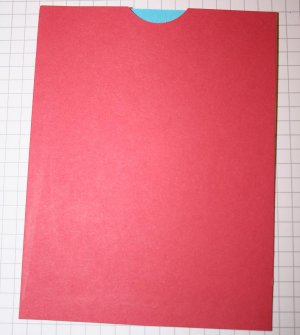
- One 4 1/4" x 5 1/2" piece of cardstock for the back (here Ruby Red)
- One 3 1/4" x 4 3/4" piece of cardstock for the slider (optional, here Tempting Turquoise)
- One 1/2" x 7" piece of copy paper for stabilizer (optional)
- Scraps of cardstock for your pop-up image
- Paper cutter with cutting and scoring blade
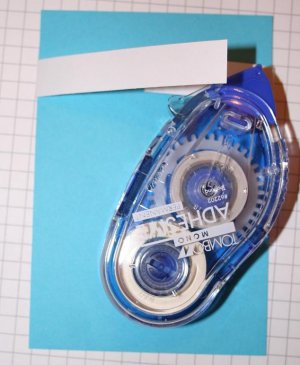
- Sticky Strip™
- Tape runner
- Ribbon
- Circle punch
- Hole punch
- Stamps
- Ink and colors for your image
Step-by-Step
-
Step 1
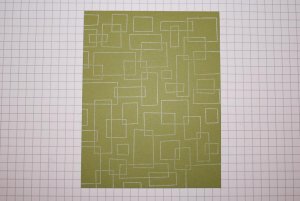
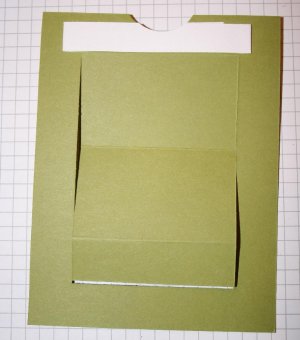
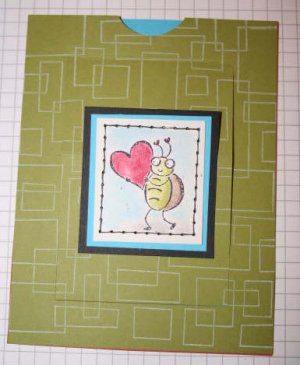
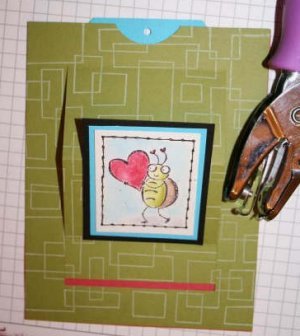
Decorate your 4 1/4" x 5 1/2" piece of cardstock for the front of the card.
-
Step 2
Slide your front cardstock into the paper cutter vertically. Line it up with the 3 1/2" mark and cut from 3/4" to 4 3/4".
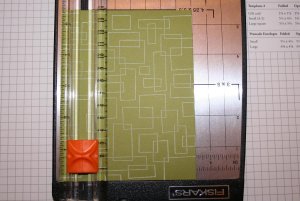
-
Step 3
Take your cardstock out, flip it around and make the same cut on the other side.
-
Step 4
Slide your cardstock into the paper cutter horizontally and line it up at the 4 3/4" line.
Cut from 3/4" to 3 1/2", connecting the two vertical lines.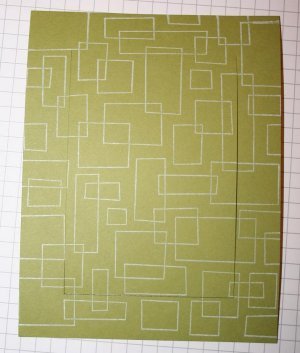
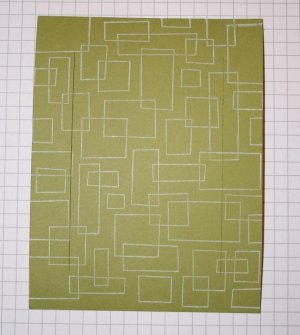
-
Step 5
Take your cutting blade out of the paper cutter and insert the scoring blade.
Slide your front cardstock in horizontally. Make sure the short cut is on the left hand side. Line it up with the 4" mark and score from 3/4" to 3 1/2" (from one cut to the other).
Ed. Note: The following measurements have been corrected. Thanks for the feedback everyone!
Slide the cardstock to the 2 3/8" mark and again score from 3/4" to 3 1/2". Now slide it again to the 3/4" mark and make the same score one more time.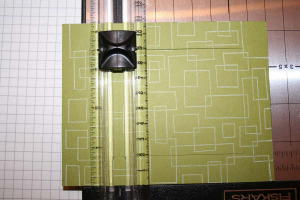
-
Step 6
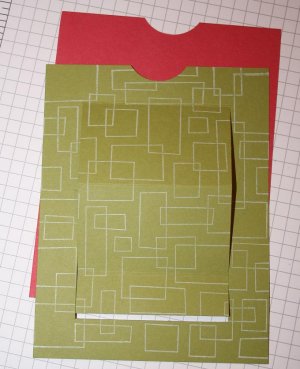
Lay your front and back piece of cardstock on top of each other.
Slide them about 1/4" into the circle punch and punch out a half circle.
Note: Make sure you make the punch on the side of the front cardstock, where you have a score on the 3/4" mark, not the cut.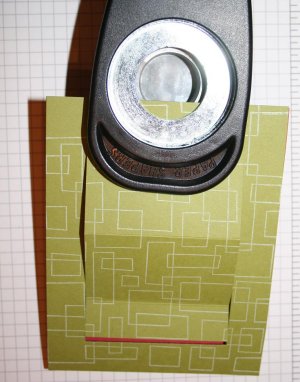
-
-
Step 7 (Optional)
Take your 3 1/4" x 4 3/4" piece of cardstock for the slider part of the card. Wrap your 1/2" x 7" piece of copy paper loosely around it and tape the end together. This loop will keep your slider part stable.
-
Step 8 (Optional)
Tape your "stabilizer" to the back of your front piece of cardstock. Tape it right over the the top score. If it shows through the circle cut out, just use your circle punch to punch it out.
-
Step 9 (Optional)
Take your slider piece and cut the top ends off to create a tag.
You can also leave it as it is, or use the corner rounder. Whatever works for your card.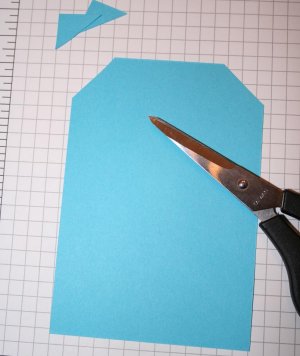
-
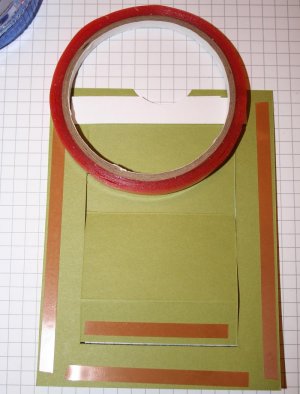
Step 10
Tape Sticky Strip™ on the left, right and bottom of the back of your front piece of cardstock. Also add a strip on the bottom of the flap.
-
Step 11
Take your slider part, slide it through your "stabilizer" loop. Peel off the liner of the Sticky Strip™ on the flap and line the end of your slider part up with the end of your flap. Tape it on.
-
Step 12
Remove the rest of the Sticky Strip™ plastic and line up the back piece of cardstock over the front piece. Tape together.
-
Step 13
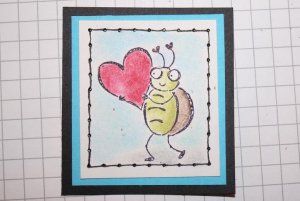
Stamp the image for your front and color and layer if needed.
-
Step 14
Tape the image to the front of your card. Line the image up with the bottom score. Only add tape up to the middle score and no further.
-
Step 15
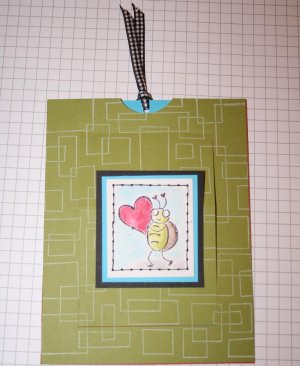
Pull your slider part out a bit and punch a hole in the middle of the top.
-
Step 16
Tie ribbon through the hole.
-
Step 17
Pull your slider out a bit, revealing the red back. Stamp an image or a saying in it. You could also write your message here if you want.
Your card is finished.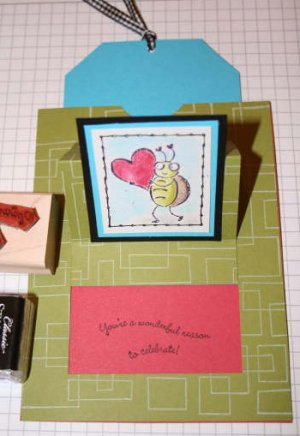
Video!
Variations
Size it differently
Instead of making your long cuts from 3/4" to 4 3/4", cut from 0 all the way to 4". Then make the horizontal scores at 1/2", 2 1/4" and 4" of the flap.
Change your punch shape
Use a square punch or even cut out a rectangle on top instead of the circle punch shown here.
Make it a full card
Start with a 4" x 5 1/4" piece of cardstock. Line cardstock up at 3/4" and cut from 3/4" to 4 1/2". Turn cardstock and cut the opposite side the same way. Then cut between the cuts on one side, and score on the other. The other score lines are at 1 1/4" and 2 7/8". The tag measures 3" x 4 1/2".
Pop up a cutout image
Use a cut out image to pop up instead of the stamped piece of cardstock.
Your Turn
You've seen the tutorial, now you try it! We've got a section of the gallery set aside for Surprise Pop Up Card. Try this technique, then upload your artwork to the gallery. Show us your creations!
***Please note - Internet Explorer/Edge is not a supported browser, and will not allow you to see the videos. Please use Chrome, Firefox or Safari to view our tutorial videos.
Questions and Comments
We'd love to get your feedback or questions. Leave your comment below.
3 1/4 x 2 1/4" piece of cardstock for front piece
2- 3 1/2 x 2 1/2" piece for the base (You can make the back stronger by
double layering it)
1 1/4" x 3" piece for the slider piece
1 1/4 x 1" piece of cardstock for the pop up piece
1/4" double sticky tape w/ paper coating on one side
hole punch
1/2" circle punch
eyelet
2" bit of ribbon for pull
I love your tutorials and especially your videos. Would it be possible to do a video for the surprise pop up card? I am having a difficult time trying to figure it out. Thanks
Marjorie Beckles
Thanks
Clara
If there is a difference in measurements between the photo and video tutorial, always go after the photo tutorial. I have the written measurements next to me when I shoot the video, but sometimes I misspeak. I am sorry for the inconvenience.
Was trying to print out the Surprise Pop up card but the pictures are not showing up- sny clues?
Regards
Lyn
http://diningroomdrawers.blogspot.co.uk/2014/03/crazy-4-challenges-purple-onion-design.html
Page 1 of 1 pages